学习 Arduino #3 Intel Galileo Linux
Posted on 2014-06-13 20:31 in Embedded
Linux on Galileo Board
Galileo 不是简单的 Arduino 板子,实际上它运行着一个 Linux 操作系统。把它看作是 “ 兼容 Arduibo 接口的板子 ” 或许更合适一些。
Galileo 板子上容量为 8 MB 的 SPI Flash 中已经烧写了一个精简版的 Linux 系统,因为容量的限制,这个系统去掉了一些不常用的模块,比如 wi-fi 驱动,python 支持等。
Galileo 也支持从 SD 卡启动系统,并且 Intel 提供了一个基于 Yocto 项目,已经制作好的完整版 Linux 系统。当精简版系统不能满足我们的要求时(添加外设等),我们可以下载这个完整版系统镜像,烧录到 SD 卡中,并从 SD 卡中启动即可。(也可以自己基于 Yocto 项目按照自己的需求制作系统镜像)
我们并不仅仅满足于通过 Arduino IDE 对 Galileo 进行操作,放着一个操作系统,为什么不去使用呢:-P 那么怎么才能登录到这个 Linux 系统中呢?
Using Ethernet
Intel 论坛的一个帖子列举了几种登录到 Galileo Linux 的方法
Connecting to Galileo via Linux Console
- Use the UART connector
- Use the LAN connection direct to your PC
- Use the LAN connection and connect to your local network
- You can also connect using WiFi
考虑到我们目前有的材料
- Galileo 开发板
- Galileo 电源
- micro USB 线
- 5 类网线
- 运行着 Linux (Ubuntu) 的 PC
因为没有串口线,所以我们采用第 2 种方案,即直接连接 PC 和 Galileo,通过 Ethernet 登录。
Summary
Galileo 默认是不开启 Lan 的,也不开启 Telnet 服务,所以我们需要做的事就是写一个 sketch,启动 Lan 连接服务和 Telnet 服务,然后分别给 PC 和 Galileo 一个属于同一子网的静态 IP 地址,这样就可以使用 PC 通过 Telnet 协议登录到 Galileo 上的 Linux 系统中。
Setp 1: Write sketch
代码需要完成的功能一共有 3 个:
-
开启 telnet 服务
1system("telnetd -l /bin/sh"); -
设置 IP 地址
1system("ifconfig eth0 169.254.1.1 netmask 255.255.0.0 up"); -
将板子的以太网配置状态显示在 serial monitor 中
1system("ifconfig eth0 > /dev/ttyACM0")
全部代码如下
1 2 3 4 5 6 7 8 9 10 11 12 13 14 15 16 17 18 | |
Step 2: Connect,Upload
-
网线直连 PC 和 Galileo,设置 PC 的 IP 地址为
link-local only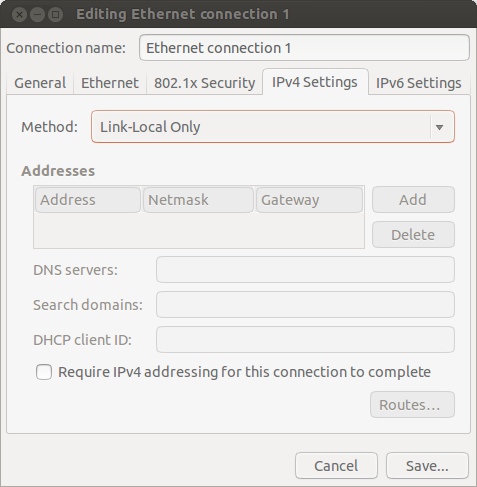
-
给 Galileo 供电
-
连接 USB
-
打开 Arduino IDE,
Upload上面的 sketch
Step 3: Login
-
打开 IDE 的 serial monitor,可以看到 Galileo 的 ethernet 配置信息
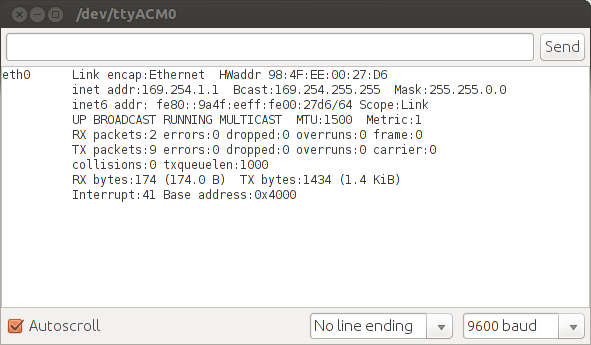
-
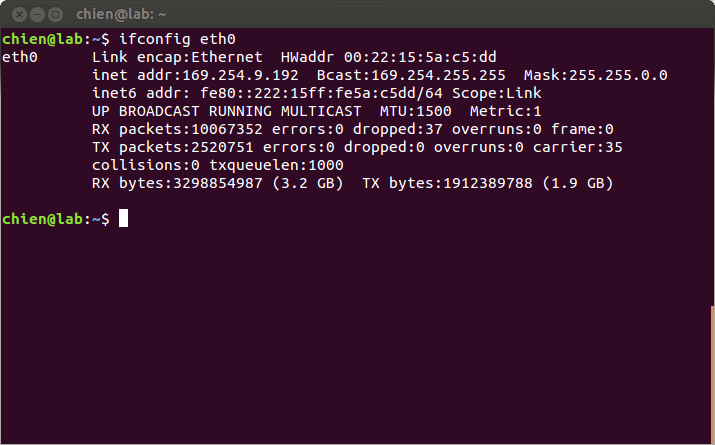
查看 PC 的网络配置
1$ ifconfig eth0查询结果
-
打开 PC 的终端 Terminal,使用 telnet 登录
1telnet 169.254.1.1登录结果,如图
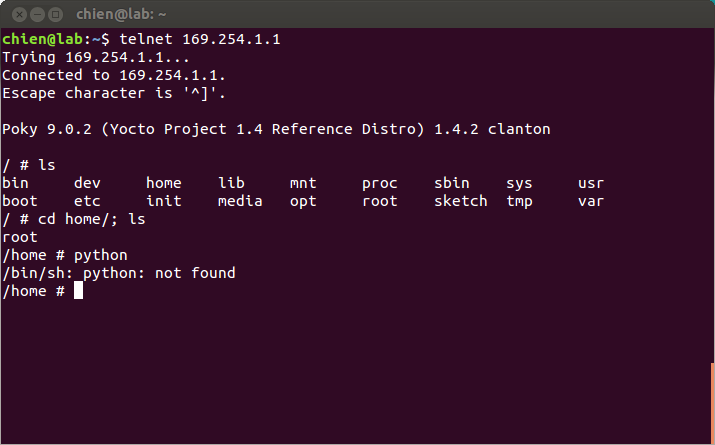
可以看到,这个精简版的 Linux 系统是不支持 Python 的。
Using UART
About serial port
如果有串口线的话,我们也可以通过串口来登录,包括 SPI 和 SD 卡上的系统。
关于串口线,说明一下。估计是为了节省板子的面积,Intel 在板子上设置的是音频接口 (AV jack),所以,这里需要额外的一个将音频接口转接为串口的器件。有两种方法:
-
上网买一个
-
自己 DIY 一个
如果上网买的话,注意 Galileo 用的是 RS232 电平,不要买错成 TTL 电平的。如果是自己 DIY 的话,Intel Galileo Get Started 里面有介绍串口线的接法,他们的论坛上也有相关的讨论:
Linux Platform
我在 Ubuntu 下使用的终端软件是 gtkterm。
Step 1: Burn the full-linux sytem
-
Intel 官网提供的完整版 Linux 镜像是基于
Yocto项目裁剪出来的,取名叫Claton,目前 (2014-6-13) 的版本号为1.0.0,但是这个版本在我的 SD 卡中是无法启动的,浪费了大量时间,最后终于发现0.7.5版本可以 ... -
还有就是 Get Started 中推荐不要使用 PC 操作系统提供的格式化功能,更好的选择应该是专业格式化软件,比如
SDFormatter。但是我实际使用时,发现反而是SDFormatter制作的不能启动 ...
Step 2: Connect
-
插入 SD 卡
-
配置串口
选择正确的端口(因为我使用的串口线是
AV-RS232-USB,所以下面选择的端口是ttyUSB0);Baud Rate = 115200,Bits =8,Stopbits = 1,Parity = none,Flow control = none -
先不要接 USB 下载线,给板子上电
Step 3: Login
-
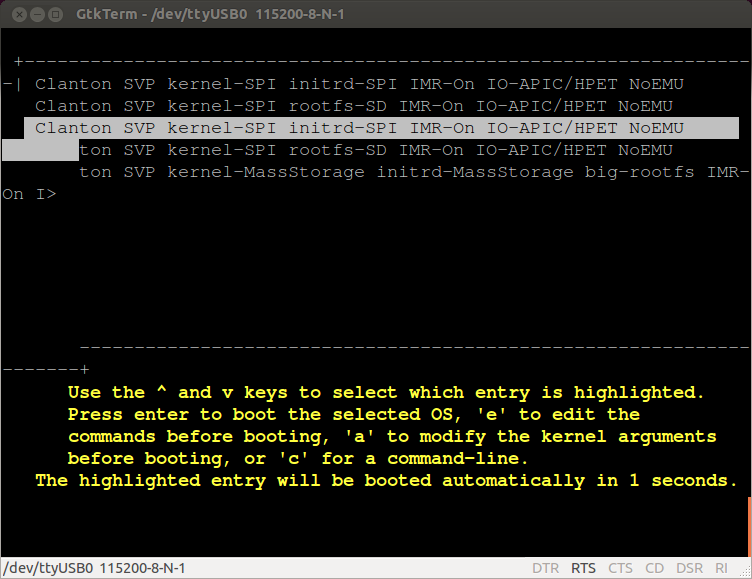
这时候我们应该就可以从串口看到板子上电后
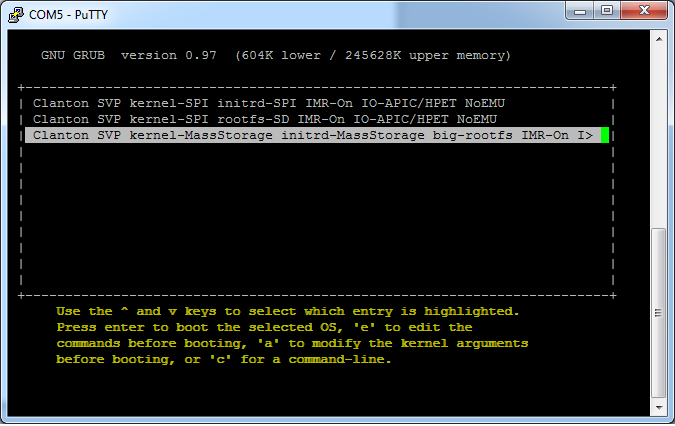
grub程序和系统启动的相关信息了。上电后,
grub引导启动哪个系统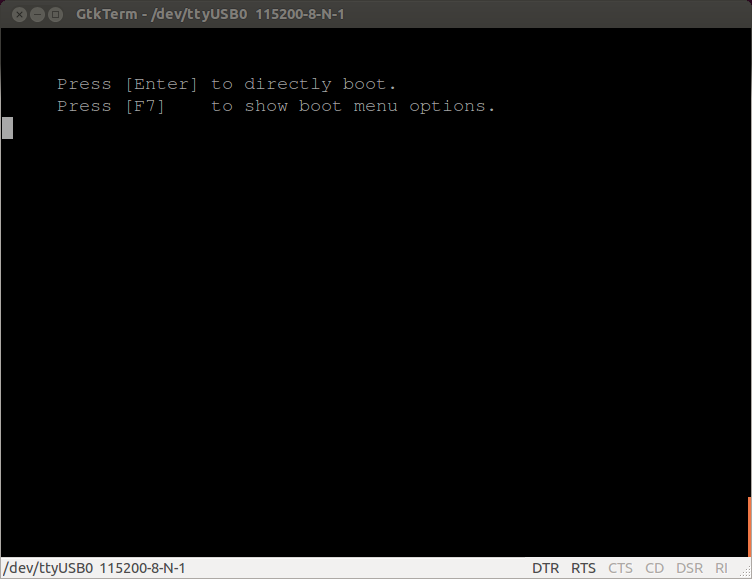
-
登录到 SPI Flash 中的 Linux 中
如图,这个精简版的系统不支持
python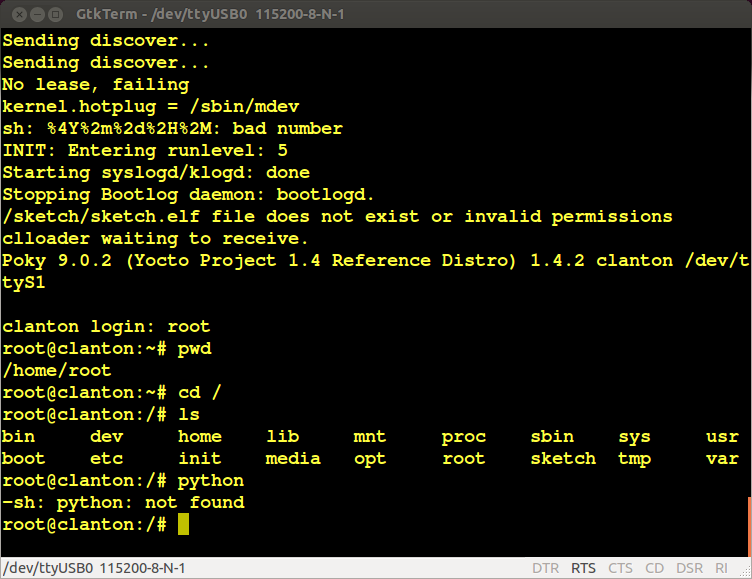
-
登录到 mirco-SD card 中的 Linux 中
如图,SD 卡中的系统是支持
python的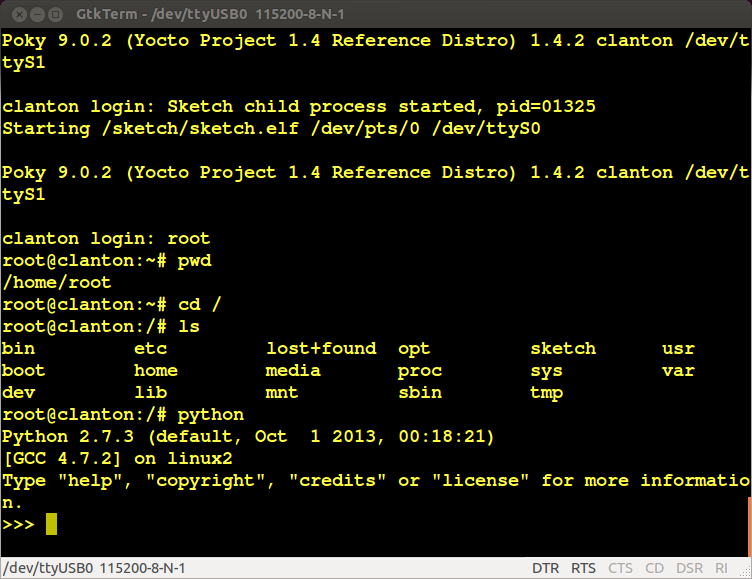
Windows Platform
我在 Windows 下使用的终端软件是 Putty。
Step 1: Burn the full-linux system
与 Linux 平台下相同。
Step 2: Connect
-
插入 SD 卡
-
配置串口
同样,选择正确的端口和波特率。
-
先不要接 USB 下载线,给板子上电
Step 3: Login
-
这时候我们应该就可以从串口看到板子上电后
grub程序和系统启动的相关信息了。上电后,
grub引导启动哪个系统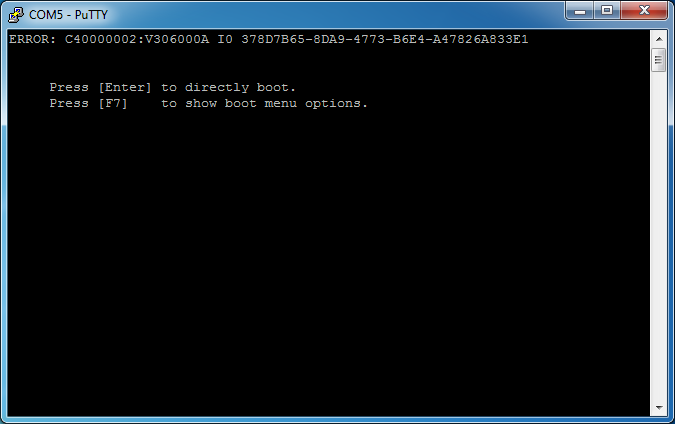
-
登录到 SPI Flash 中的 Linux 中
如图,这个精简版的系统不支持
python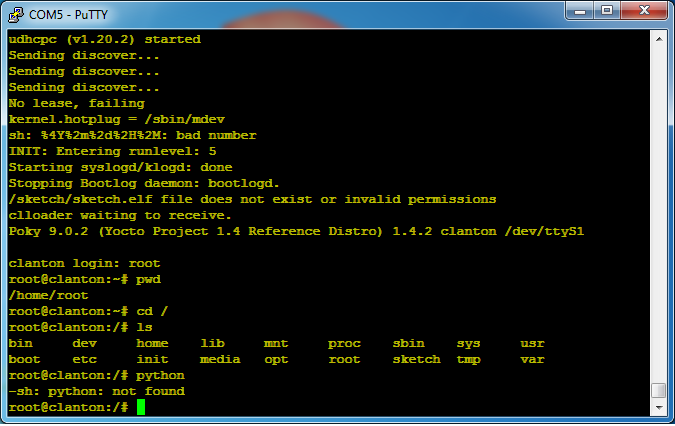
-
登录到 mirco-SD card 中的 Linux 中
如图,SD 卡中的系统是支持
python的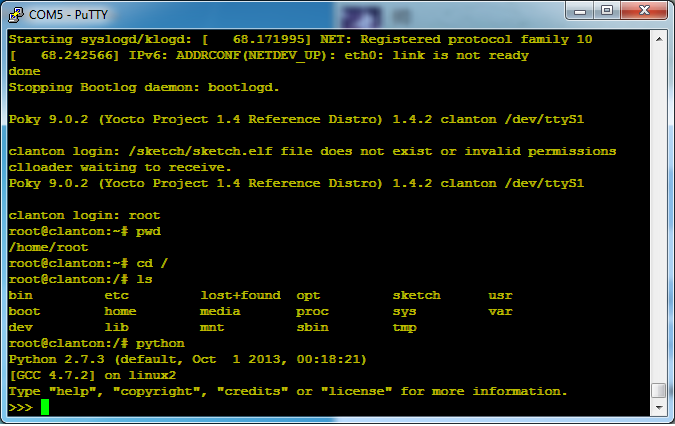
Another method
如果你觉得插网线、配置 IP 地址太麻烦,甚至懒得自己 DIY 串口线,也没有钱去买一个,别担心,因为 “ 天空飘来五个字,这都不是事~” 因为你可以借鉴下面这位大神的方法,只需要像下载普通 sketch 一样,将他提供的 sketch 下载到 Galileo 中就可以了,然后通过 IDE 的 serial monitor 就可以登录到 Linux 系统中:
他的 sketch 的原理就是使用 system() 函数将我们在 serial monitor 中的命令传到到 Linux shell 中 ,并将命令的结果返回到 serial monitor 中 。
不过这种方法的缺点是每个命令传递到 Galileo 后会开辟一个新的进程,当命令执行完返回结果时,这个进程自动结束,所以会产生一些 “ 问题 ”:当我们 cd 到某个子目录后,返回结果之后,我们又回到的之前的目录,举例
1 2 3 4 | |
解决方法就是将命令写在一行
1 2 3 | |
Reference
Connecting to Galileo via Linux Console
Tutorial 3: Connecting to Linux through telnet